Deploy the controller
Deploy a controller on a Linux VM in a public cloud. These steps cover Azure and AWS.
1.1 Create a VM to be used as the controller
- Azure
- AWS
- Digital Ocean
- Oracle
- IBM
It is easier to use a resource group to organize and manage all your resources for this demo.
-
Create a resource group and change into that resource group.
-
Use the + Create button to create a resource.
-
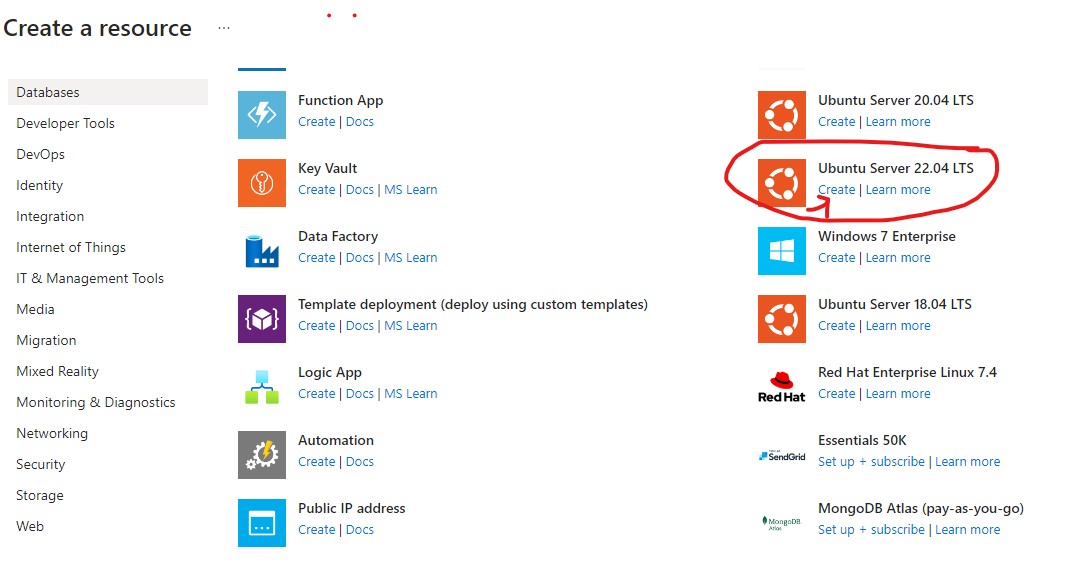
Azure will take you to the Marketplace screen. In the search bar, type in Ubuntu Server.
-
Choose "Ubuntu Server 22.04 LTS".
-
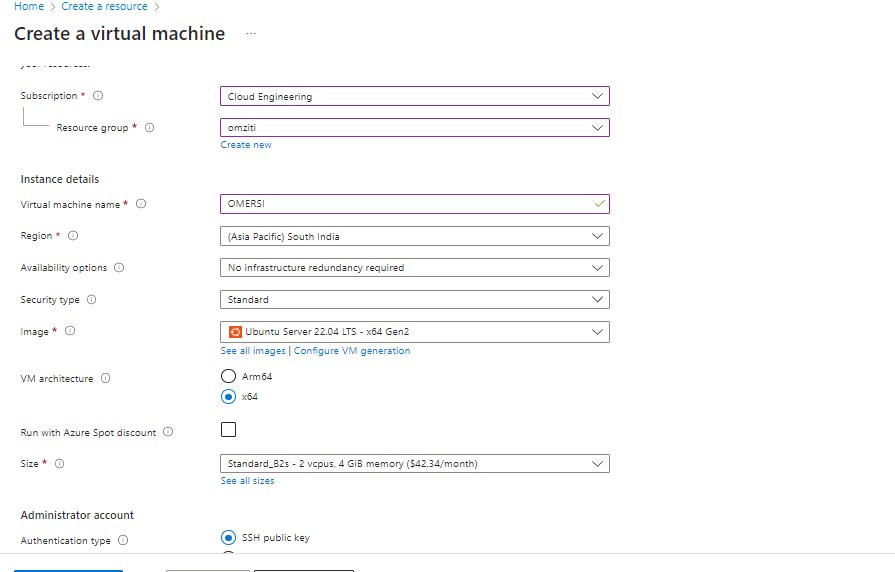
On the Create a virtual machine screen:
- The Subscription and Resource group should already be filled.
- In the Instance details section, enter the VM name.
- Select the Region to host your VM.
- Leave default Availability options and Security type(Standard).
- Leave the selected image Ubuntu Server 22.04 LTS x64 Gen2.
- For the Size, choose the appropriate size for your application. For this demo, Standard_B2s(2CPU,4 GB) size was used.
-
Configure authentication:
- Choose Authentication type to log in to the VM. Logging in with a password is insecure.
- Enter a username (remember the username, you will need it to log in to the VM), or leave the default user azureuser.
- Choose your SSH key.
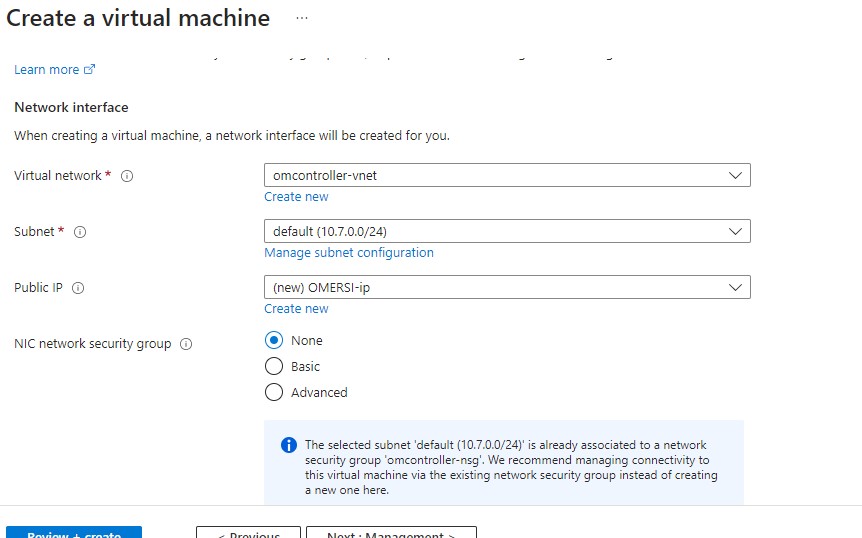
- For inbound ports, select the ssh. You can add an extra port based on your OpenZiti setup.
- You can leave everything default.
-
Press Review + create.
-
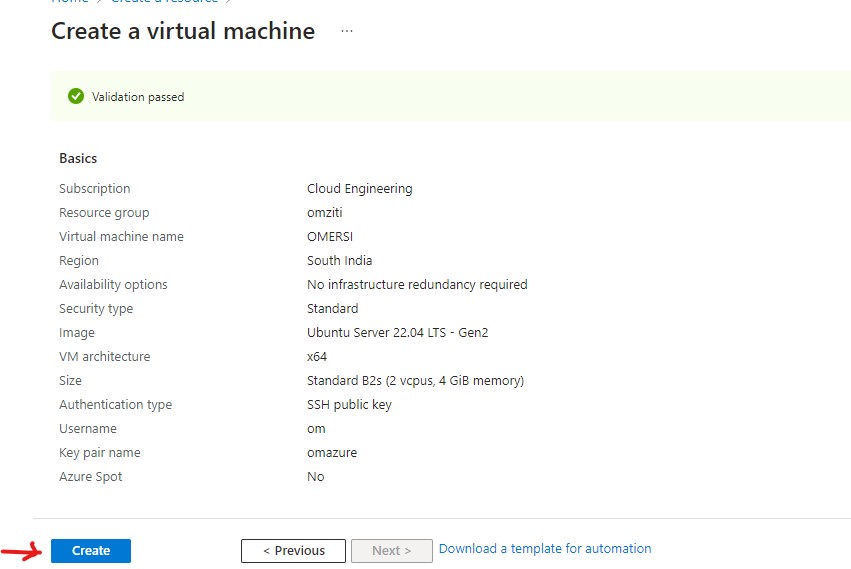
After the Validation passed, press Create to create VM.
-
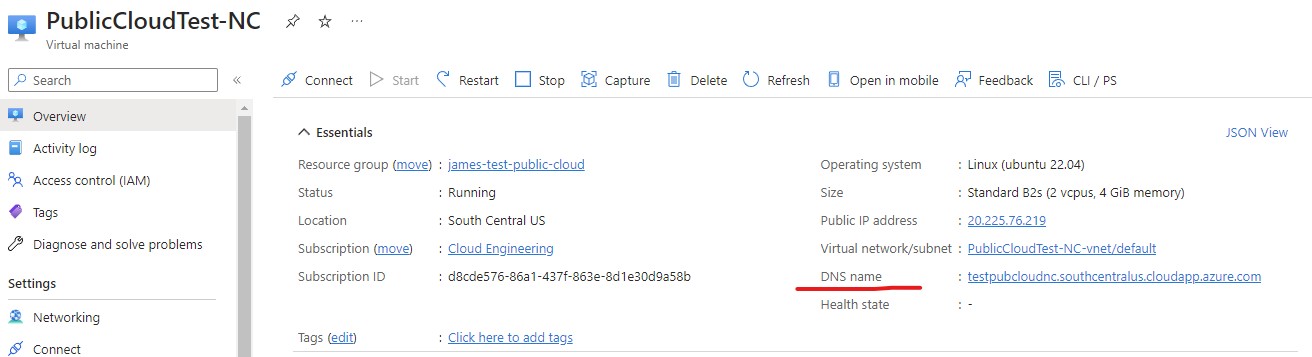
Important: If you are creating the network controller, you need to associate a DNS name to the public IP of your VM. You can do this from "Virtual machine" page.
-
Sign in to the AWS console.
-
Go to the EC2 dashboard.
-
Click the Instances.
-
Launch the instances.

-
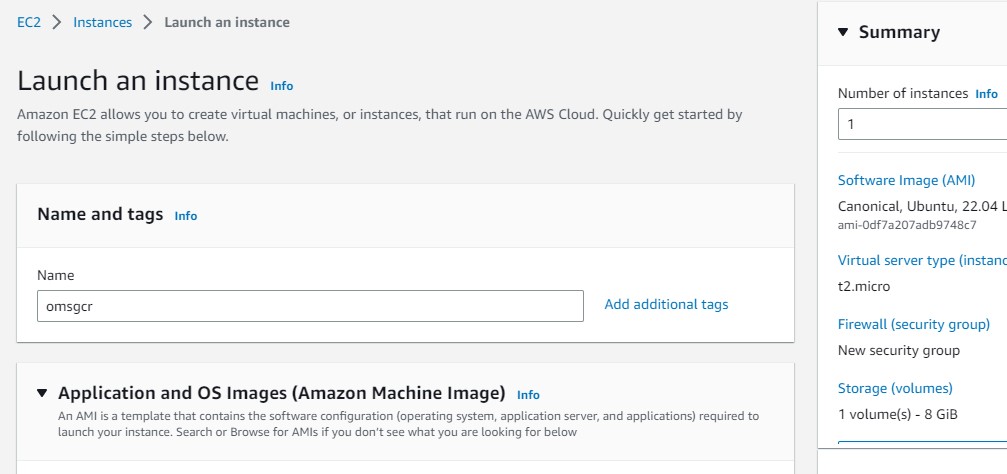
Fill the Name of your instance.
-
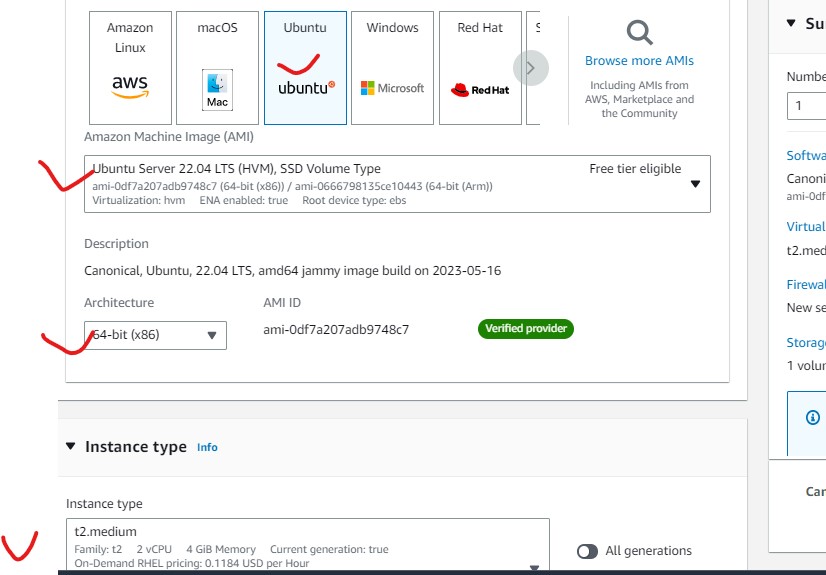
Select the image and instance type:
- On the Quick start select Ubuntu.
- Select the Ubuntu Server 22.04 LTS.
- Leave the Architecture as 64-bit (x86).
- Select the instance type t2.medium.
-
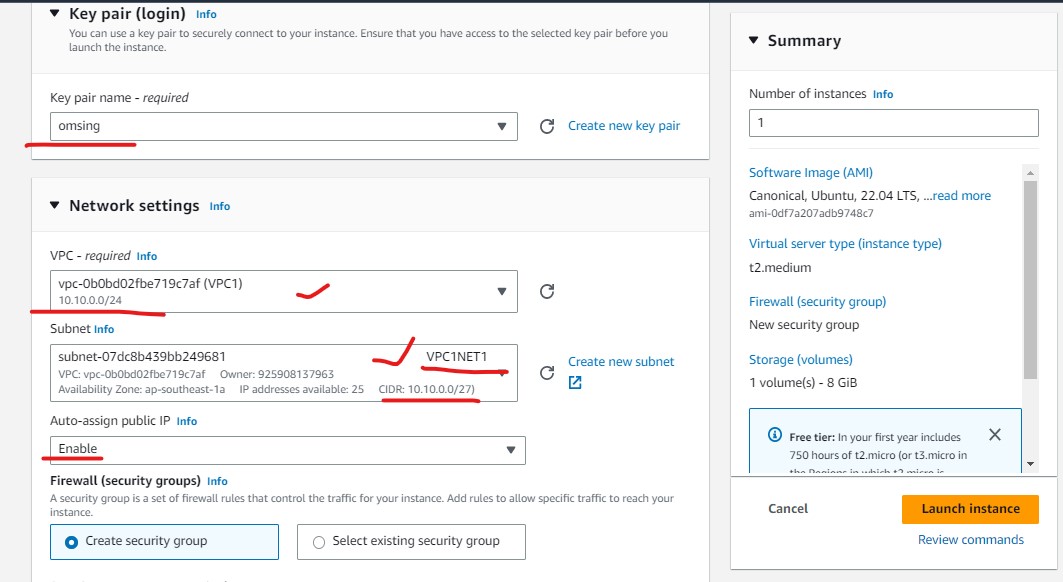
Configure the key pair and network settings:
- In the Key pair (login.) section, choose the key name which you already created.
- In the Network settings section, choose the VPC for your VM.
- Select the subnet.
- Select Enable for Auto assign public IP.
-
Create a security group:
- Click Create security group to allow traffic into your VM.
- Name the security group.
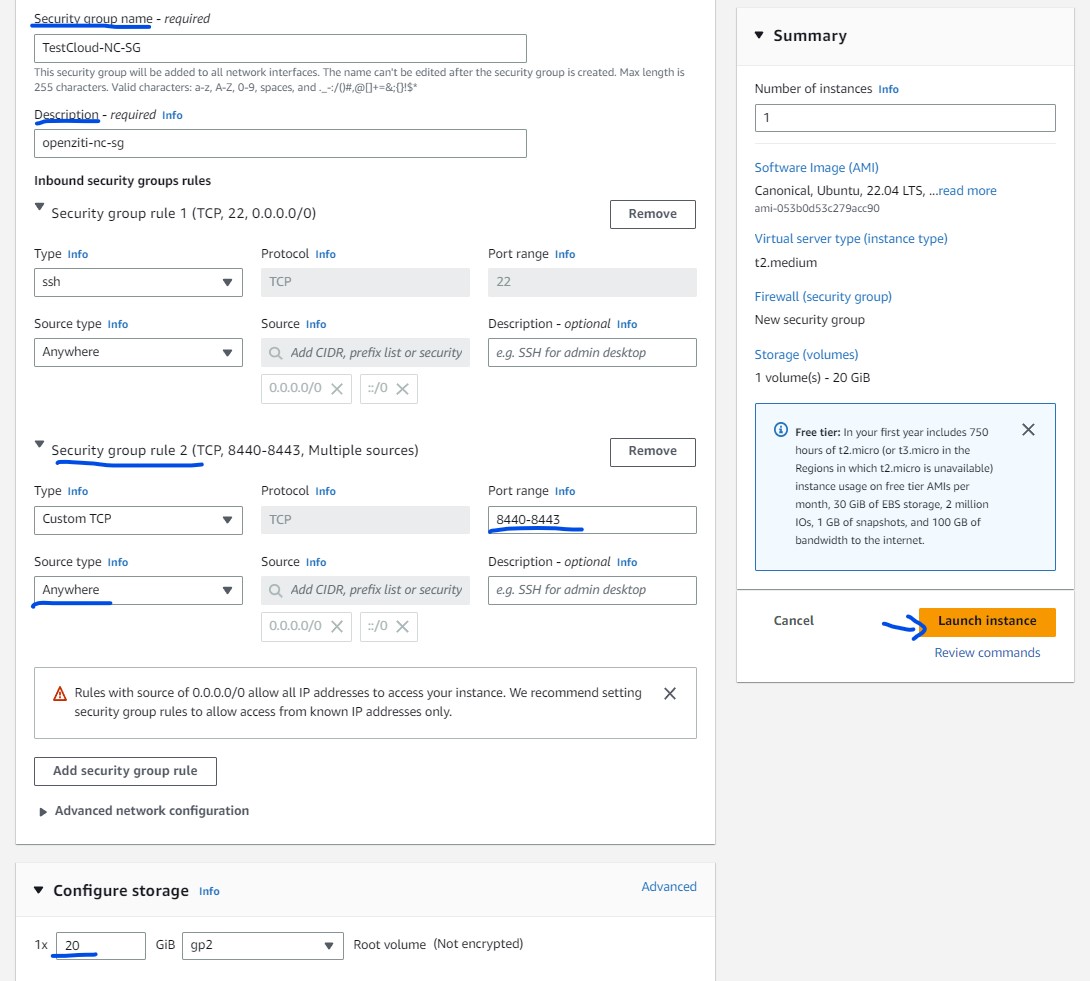
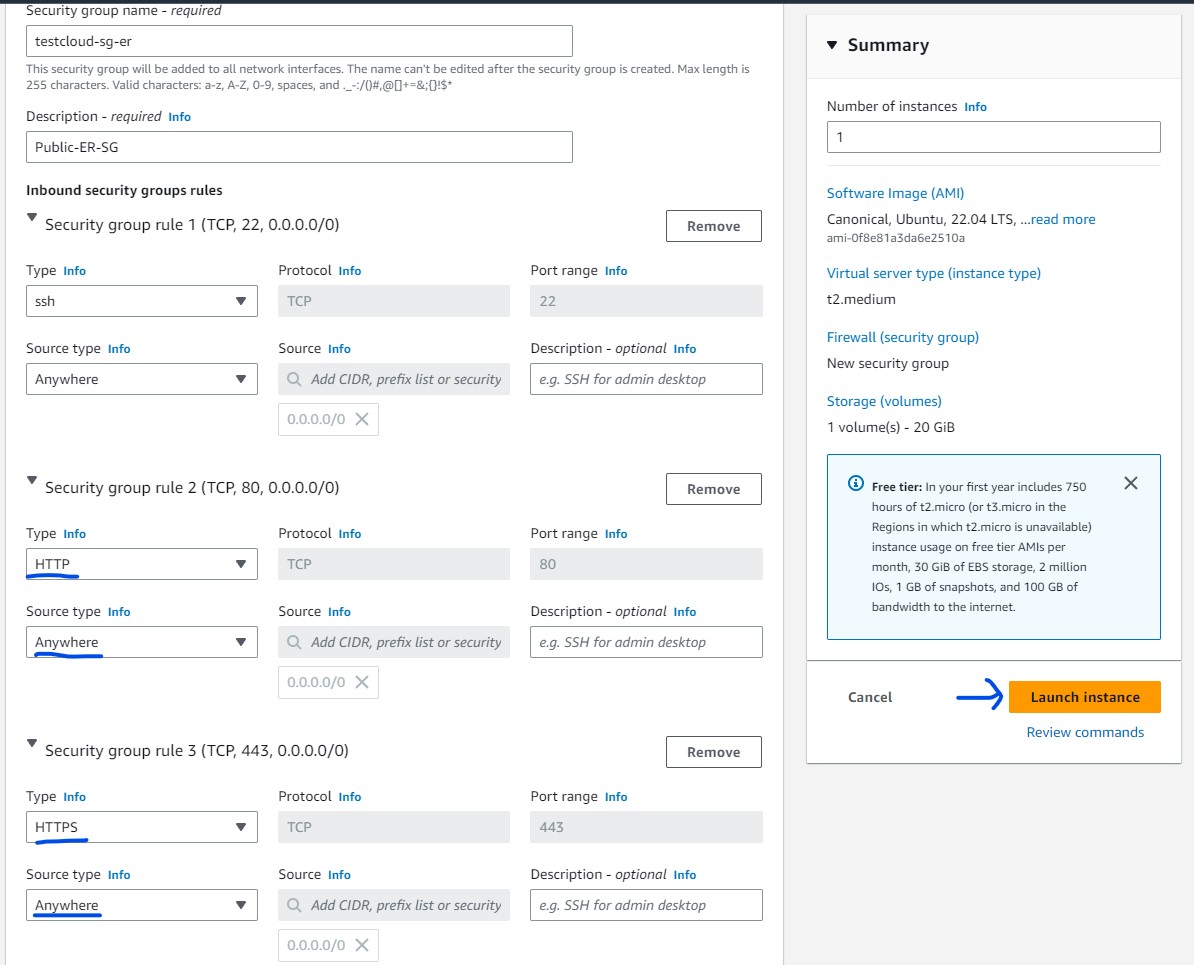
- Create the Firewall rule based on the ports you configured for the controller.
- Allow the same TCP port you configured (e.g., 1280) for the controller along with SSH.
Security Group For the controller.
Security Group for the Router
-
Under Configure storage section, choose at least 20 GiB storage space.
-
Now click Launch instance.
-
Sign in to the GCP console.
-
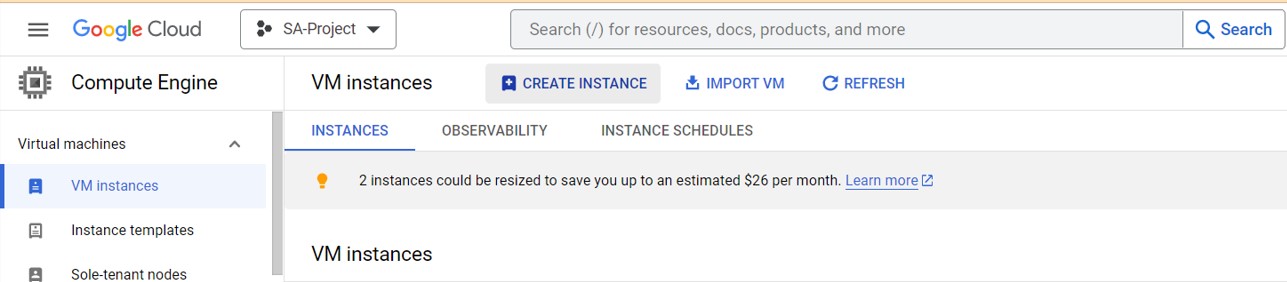
Go to COMPUTE ENGINE dashboard.
-
Click CREATE INSTANCE.
-
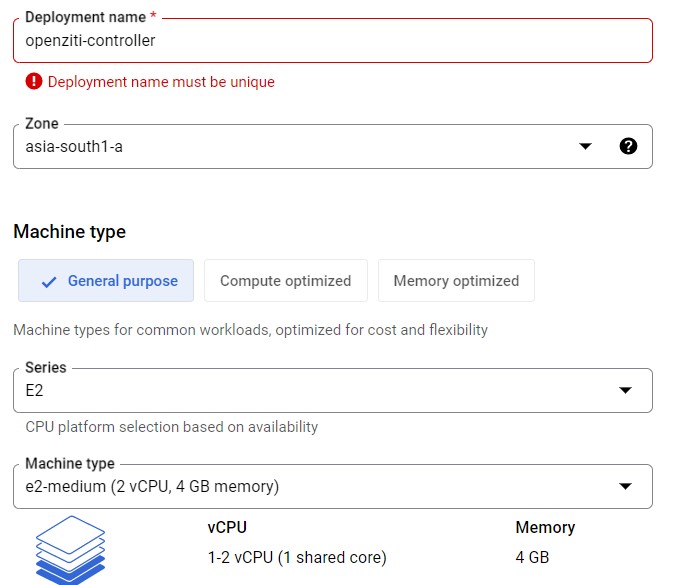
Configure the VM as follows:
- Name of the VM
- Region and Zone
- Choose e2-medium for Machine type
-
Change the OS image:
- Hit CHANGE at the "Boot disk" section to change the OS image.
- On the "Boot disk" page, choose PUBLIC IMAGES.
- Choose Ubuntu as the Operating system.
- Select Ubuntu 22.04 LTS, x86 Version.
- Hit SELECT to complete the selection.
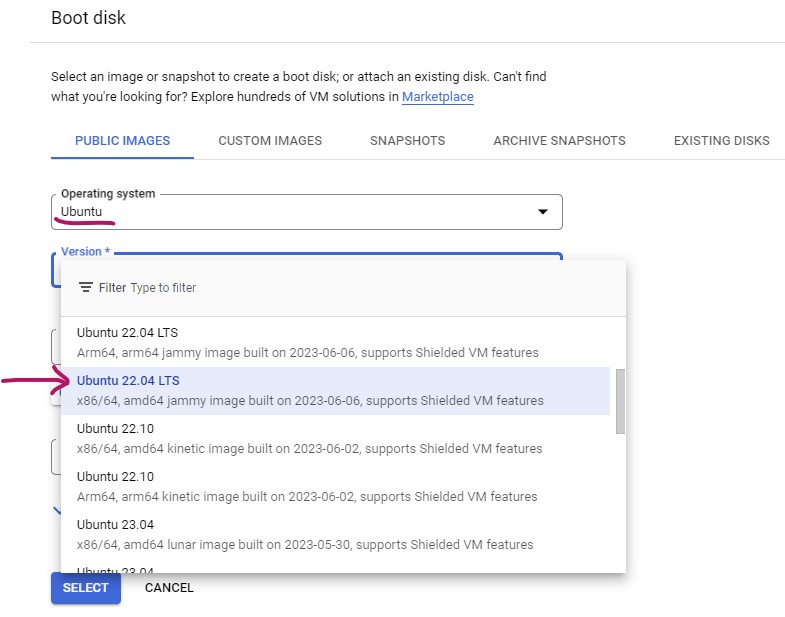
-
Configure networking:
- Open Advanced Options, and then open Networking.
- Highly recommended: assign a Network tags. This will help you to configure the firewall later.
- For local GW VM, Enable IP forwarding at this time. You will not be able to change this setting from the console after the VM is created.
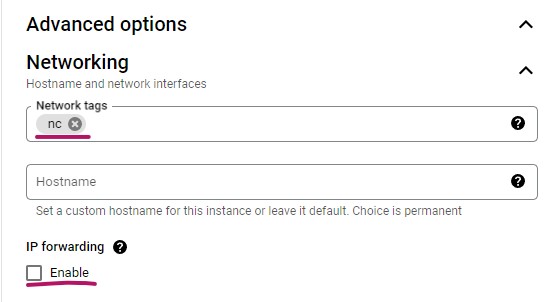
-
Optional you can reserve static external IP ADDRESS under Networking/Network interfaces section. Reserving static IP is useful for the Network controller in case you have to shut down the VM.
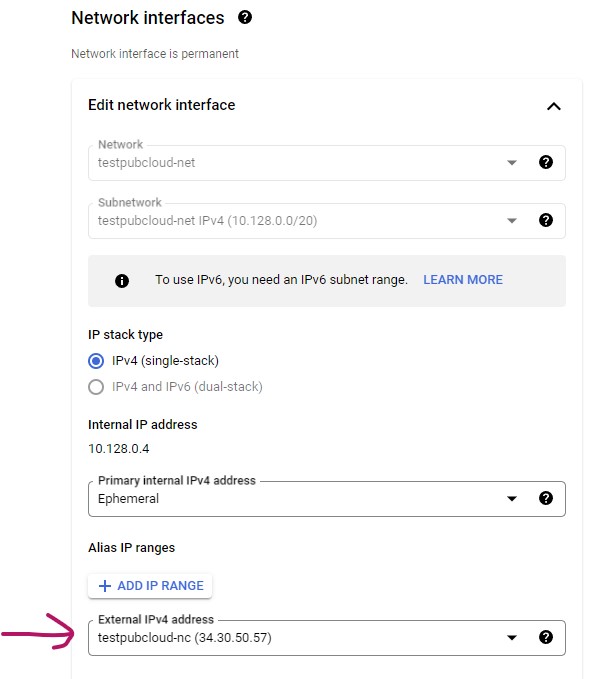
-
Now click CREATE to create the virtual machine.
-
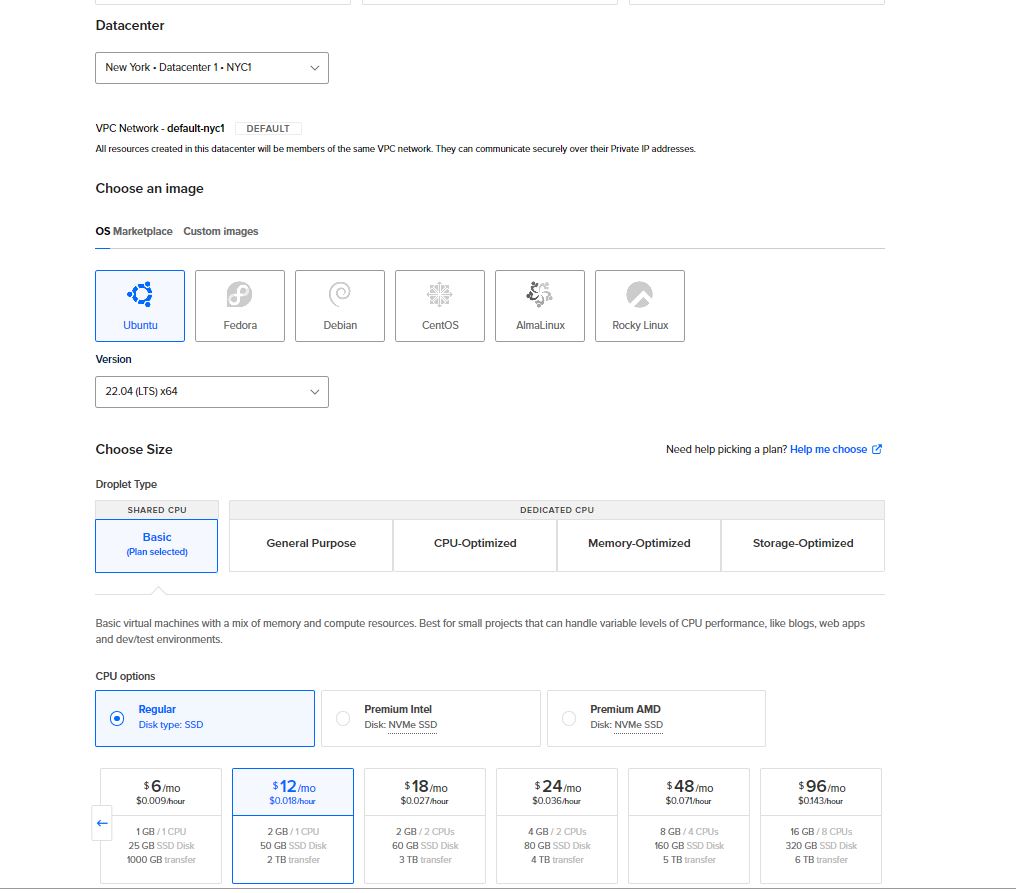
Sign in to the Digital Ocean console and create a Droplets from the dropdown menu on the upper right-hand side.
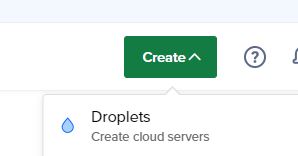
-
On the "Create Droplets" screen, choose "Ubuntu", version "22.04".
-
For the Size, choose the appropriate size for your application. For this guide, a smaller size was used.
-
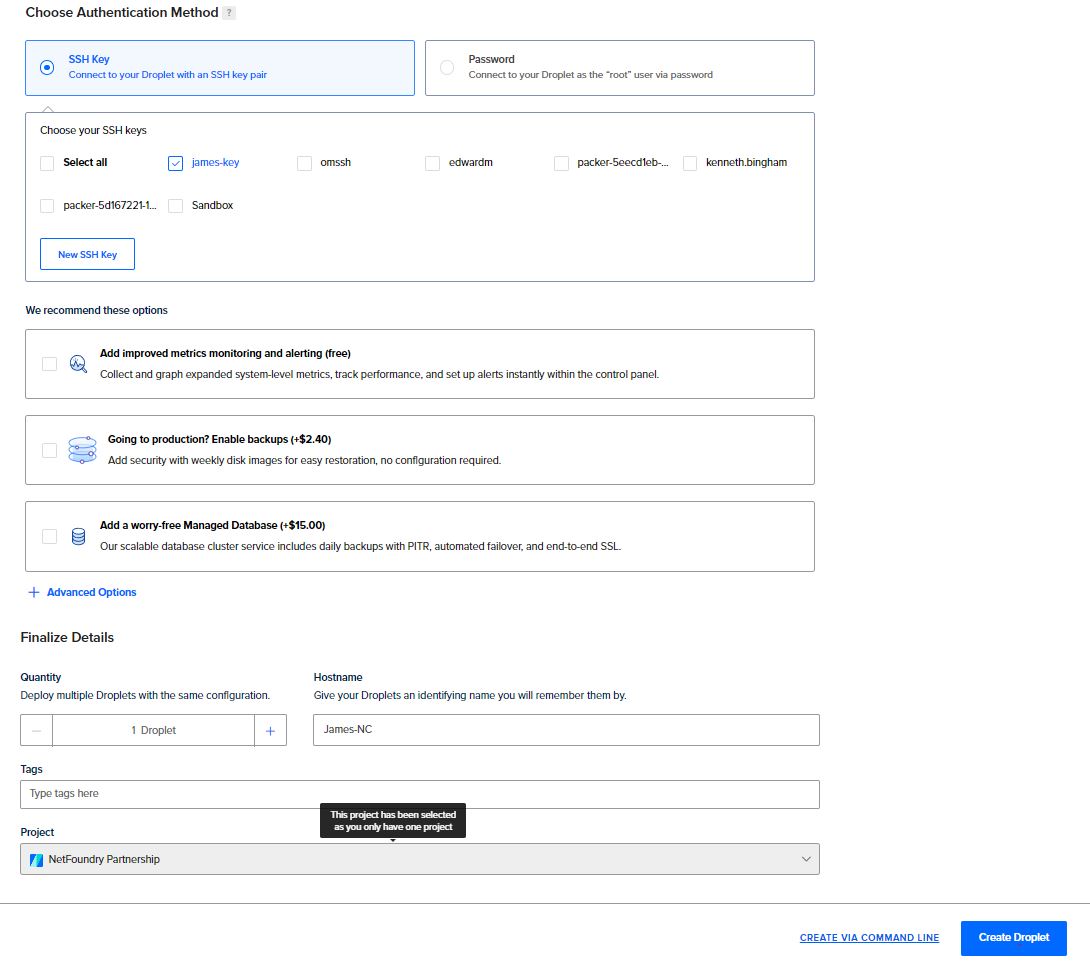
Choose an ssh-key to log in to the VM. (We highly discourage login to the VM using Password.)
-
Then Create Droplet.
-
Sign in to the ORACLE Cloud console.
-
Go to Home > Dashboard.
-
Click Instances (Under Compute category).
-
Create an instance.
-
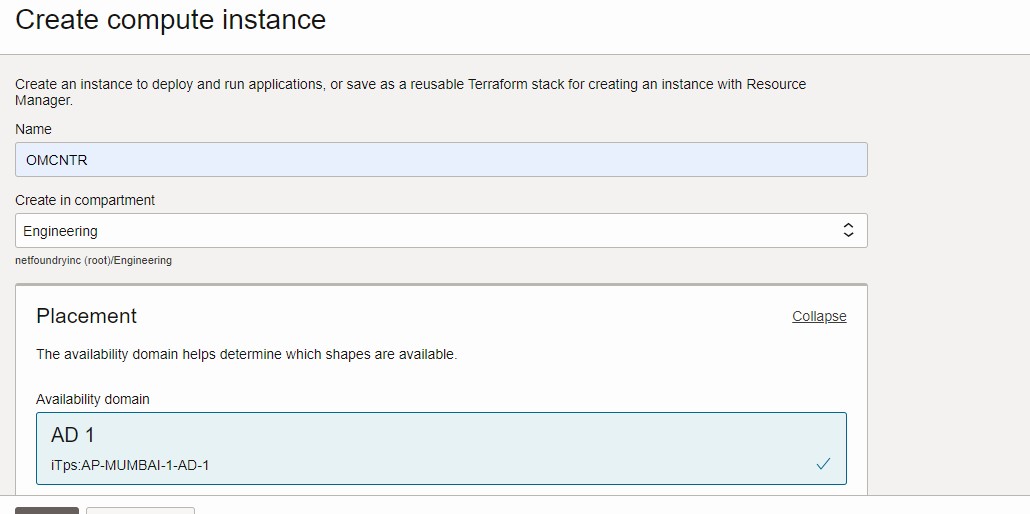
Configure the instance:
- Name the instance.
- Choose the compartment.
- Select the Availability domain under Placement.
- Leave the security disabled.
-
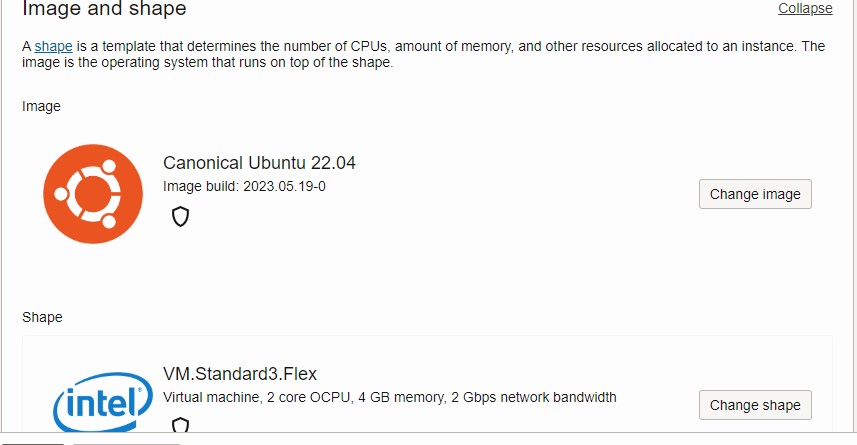
Select the image and shape:
- Under the "Image and shape selection", click Change image icon.
- Select the Ubuntu icon.
- Select the Canonical Ubuntu 22.04.
- Select any image build. And press Select image.
- Under the "Shape" selection, choose Change shape.
- Change to 2 OCUPs and 4 GB memory.
-
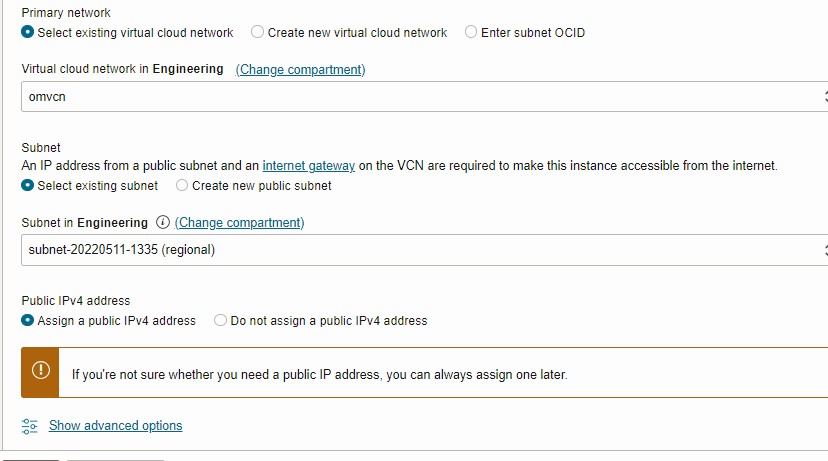
Configure networking:
- Select your Primary network and Subnet.
- For Public IPv4 address, check Assign a public IPv4 address.
-
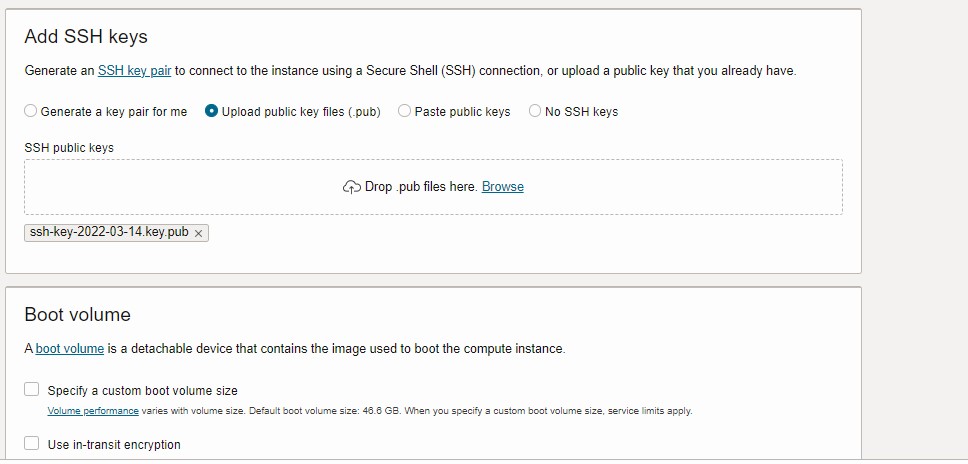
Configure SSH keys and boot volume:
- In the Add SSH keys section, choose how you want your ssh keys generated. Logging in with a password is insecure.
- Leave default boot volume.
-
Now click Create.
-
Sign in to the IBM cloud.
-
Go to dashboard.
-
Click Create resource + on the top right.
-
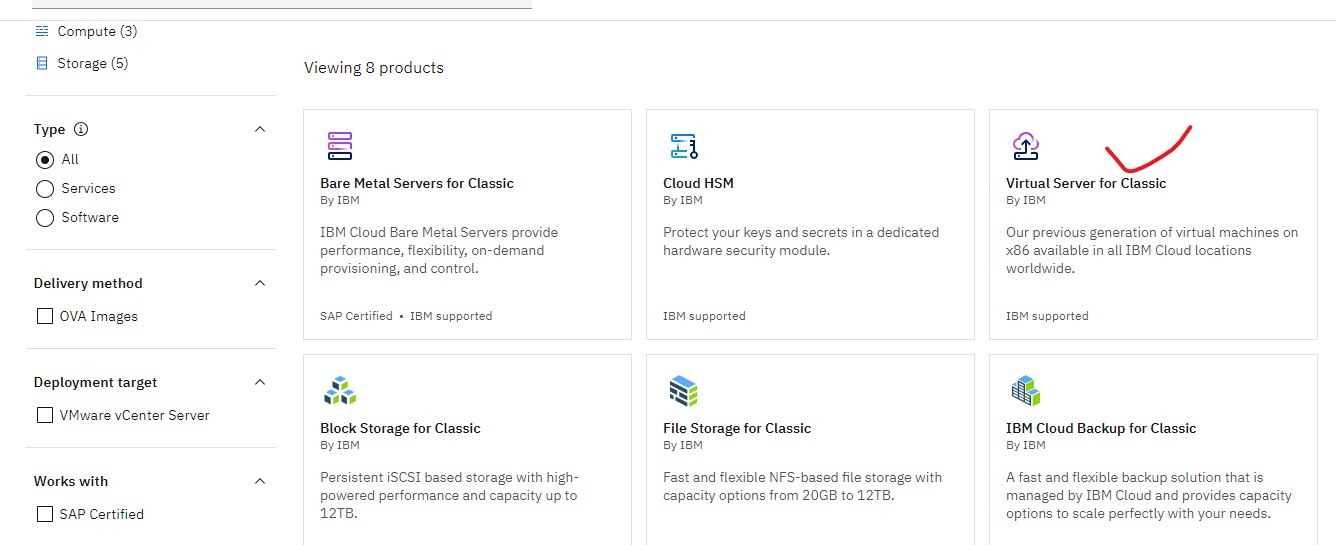
Filter on "Compute" on the Category (on the left).
-
Choose Virtual Server for Classic.
-
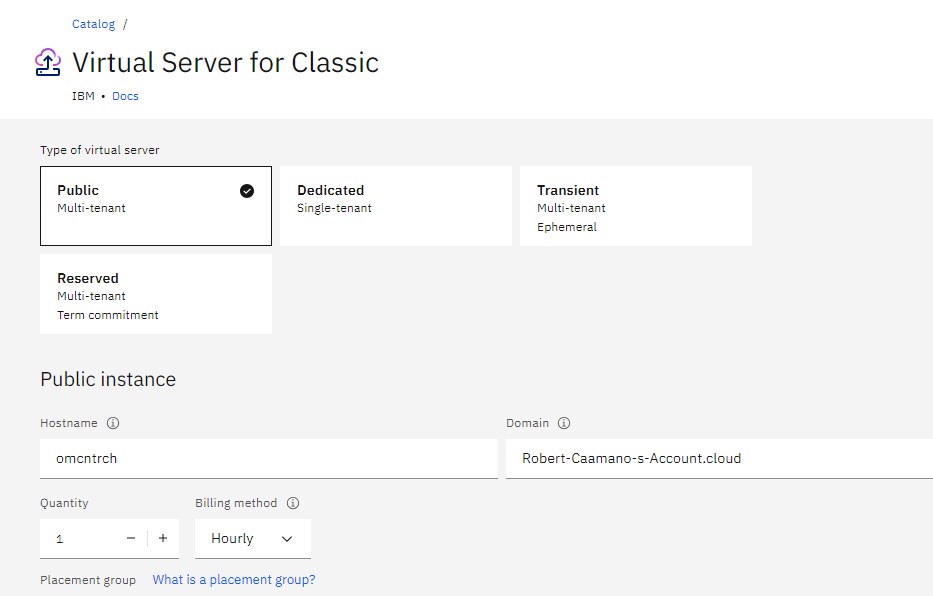
Configure the virtual server:
- Leave the "Type of virtual server" as Public.
- Give it your Hostname.
-
Select the location, profile, and image:
- Select the location.
- Select the profile, the size of B1.2x4 is adequate for our exercise.
- Choose the SSH key.
- On the "Operating system" select the Ubuntu. Select the version 22.04.
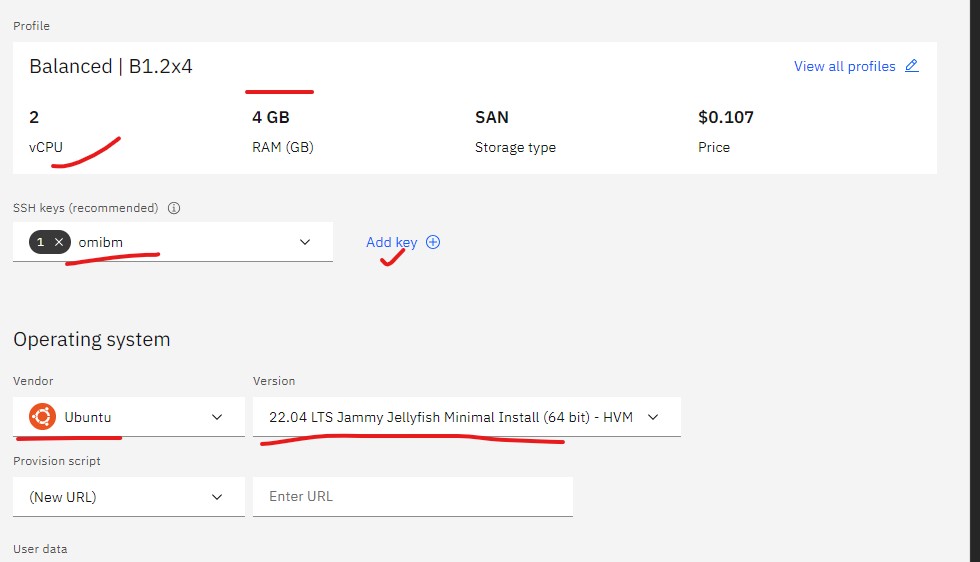
-
Leave everything else default except Add-ons, turn the Firewall features on.
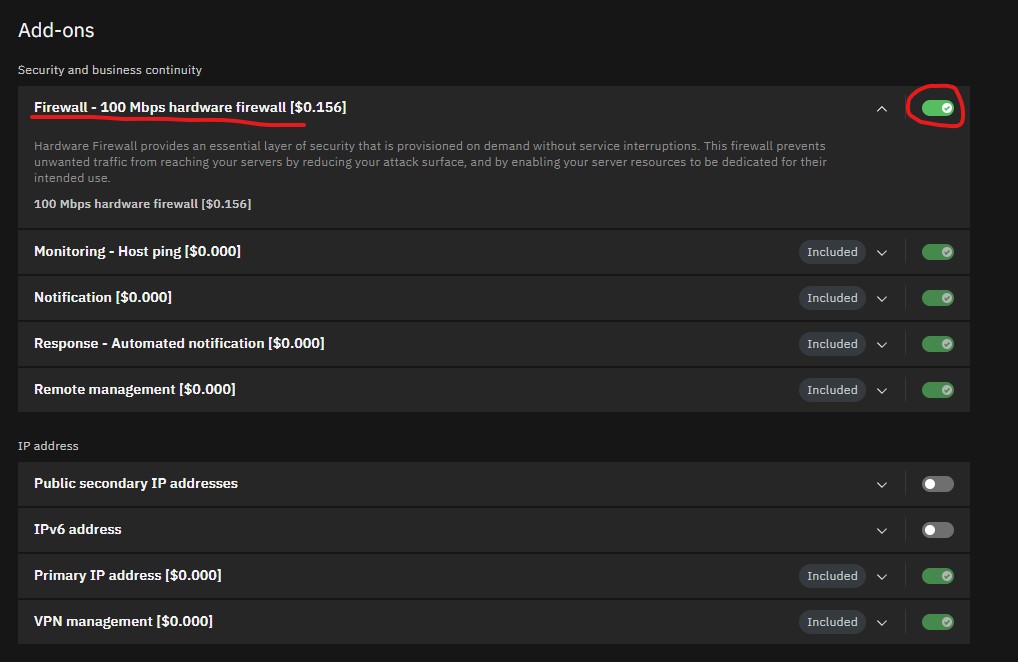
-
Alternatively, you can select allow_all under the "Public security group", and leave the Add-on Firewall feature off. This is not recommended as it opens your VM for attacks.
-
Press Create on the right side menu to create the VM.
1.2 Firewall
- Azure
- AWS
- Digital Ocean
- Oracle
- IBM
Azure's firewall is blocking all incoming access to the VM. You will need to open the ports you configured for Ziti services. Here is an example of the firewall ports.
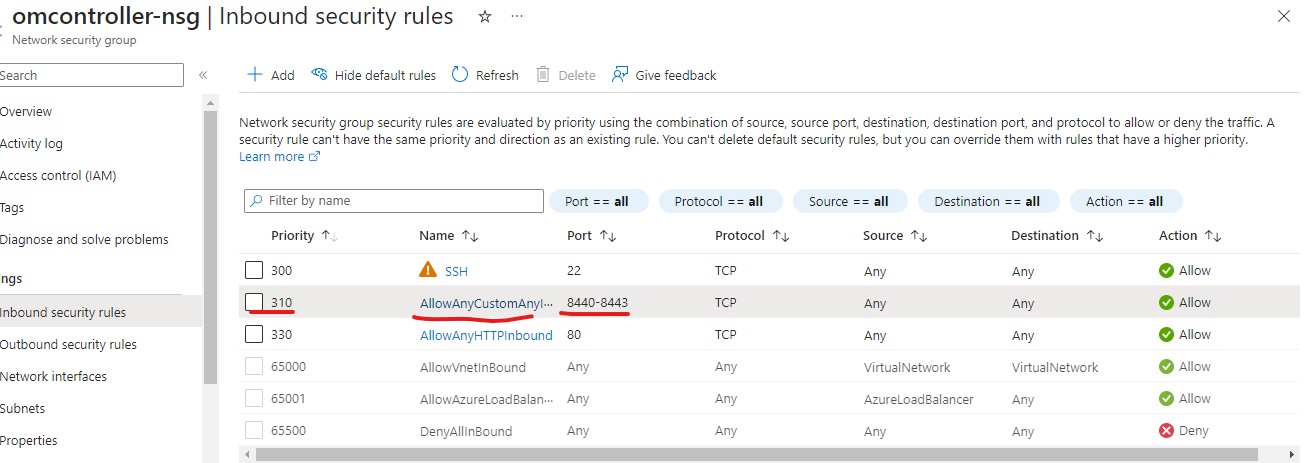
You must open the same ports in the AWS Security Group that you configured Ziti to listen for. Here is an example.
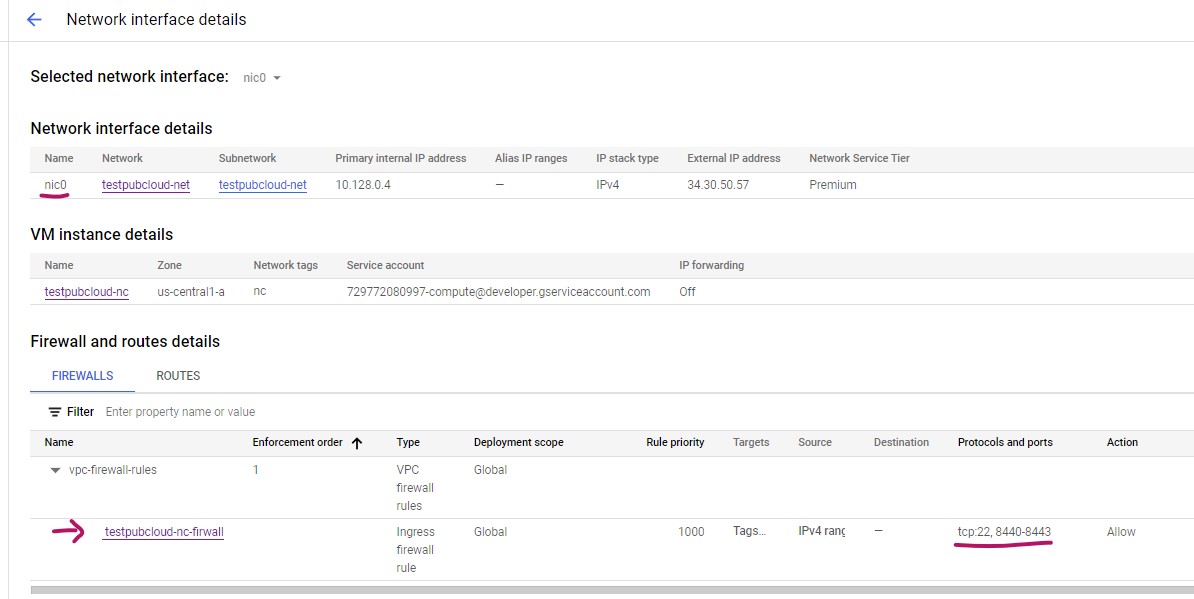
GCP’s default firewall is blocking all incoming access to the VM. You will need to open the same ports you specified for the controller and ZAC (if you plan to use ZAC). Here is an example of the firewall ports if you used the default ports.
-
Go to your VM screen, click the Network interfaces name (i.e. nic0).
-
Click Firewall menu on the left side to bring up the firewall screen.
-
On the firewall screen, click + CREATE FIREWALL RULE to create new rules.
-
Configure the firewall rule:
- Give a meaningful name to your firewall rule.
- Choose your Network.
- Use traffic direction Ingress.
- Action Allow.
- Targets, you can use "All instances in the network" (if you did not specify "Network tags" for your VM). In this example, we are using Specified target tags option.
- Enter Target tags for your VM. In this example, our tag is nc.
- Enter Source IPv4 ranges: 0.0.0.0/0.
- For the controller, you must allow the same TCP ports you configured Ziti to listen for along with the SSH port (22).
-
Hit CREATE to create rules.
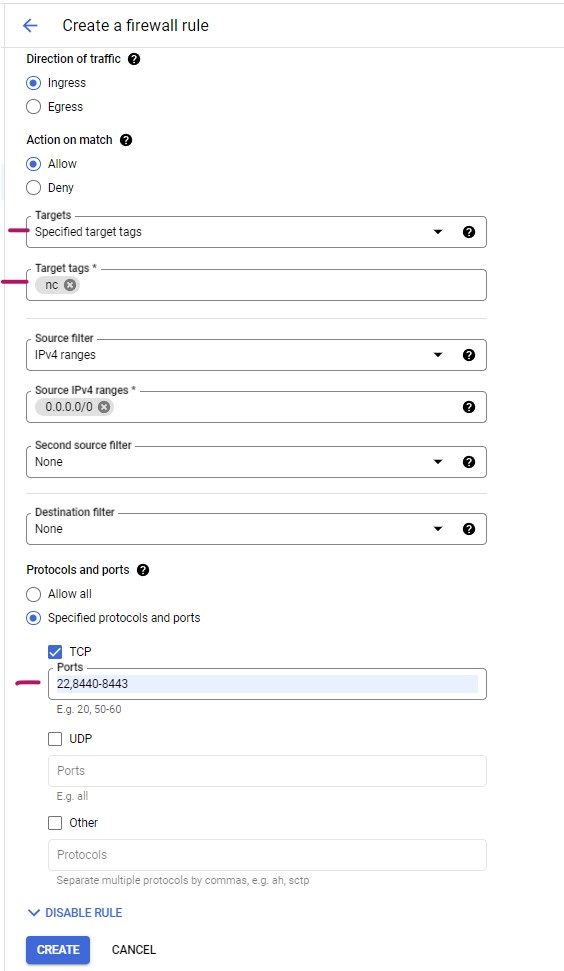
-
The firewall rule also shows up on your "Network interface details" screen. From your VM screen, click the Network interfaces name (i.e. nic0).
DigitalOcean by default does not set up the firewall for the VM.
Oracle cloud by default blocks all incoming traffic to the VM. You will need to open the ports you specified for the controller and ZAC (if you plan to use ZAC).
First, create a security group:
-
From the Networking category, select the Virtual cloud networks.
-
Select the VCN your VM is in.
-
On the left side menu, select the Network Security Group.
-
Select Create Network Security Group.
-
Name the security group and select the next.
-
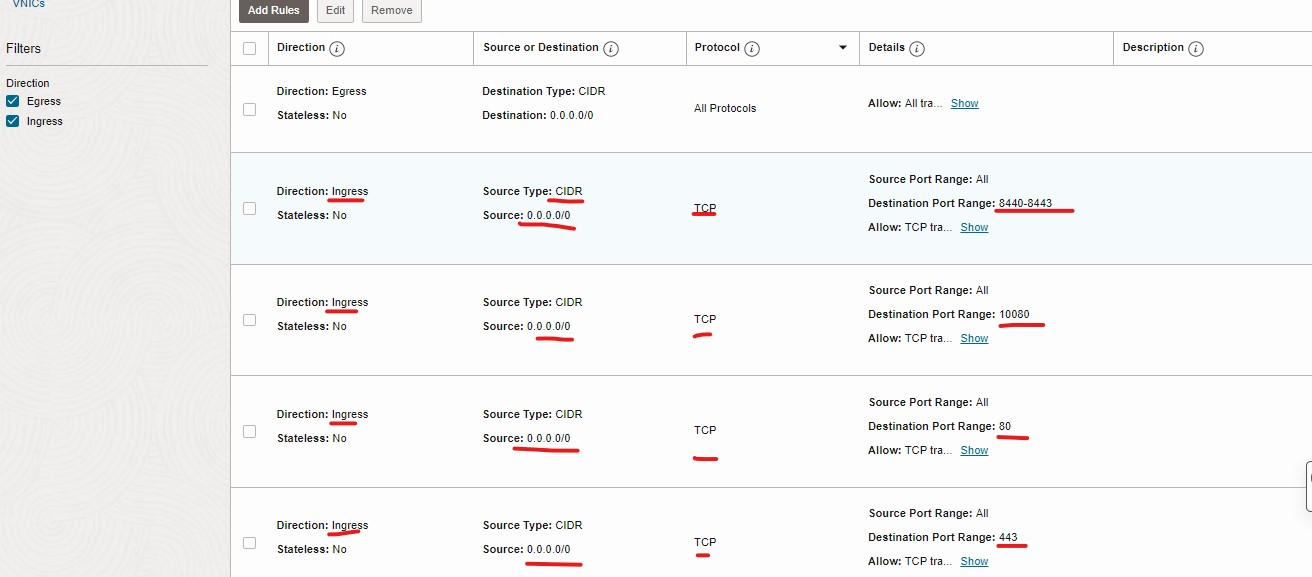
Now create rules for ingress traffic:
- Port 22/TCP for SSH
- OpenZiti ports, e.g., 1280/tcp
- Also create a rule to allow all traffic outbound (Egress).
Following is the example of the Security Group for the controller:
-
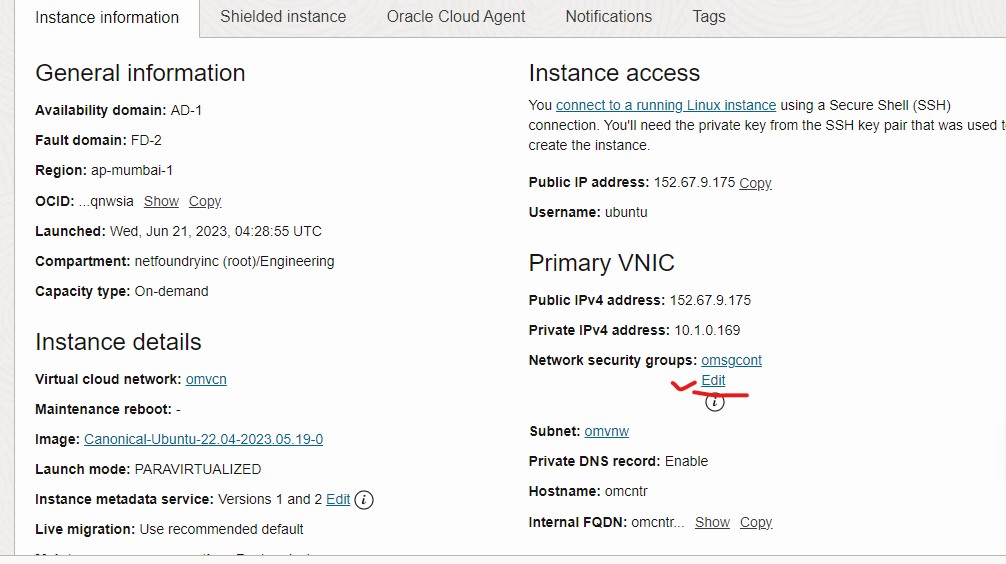
After the security group is created, attach it to the instance.
-
From the "Instance details" screen, select Edit under the Network security groups section.
-
Select the security group from the dropdown and press Save changes.
Oracle Cloud also uses Security Lists (on the subnet) to marshal the traffic. Make sure the setting under Security Lists is not conflicting with your security group rules.
After the security group configuration, ufw may not work correctly on the VM. Turn on ufw and restart the VM after configuring the security group.
- Turn on
ufwso traffic can reach the VM. - Set up
ufwto allow traffic for OpenZiti ports:
sudo ufw enable
sudo ufw allow 1280/tcp
sudo shutdown -r 0
If you turn on the firewall feature, you will need to configure firewall rules.
-
Open the Instance detail screen.
-
Find the Firewall details at the bottom right. Open it.
-
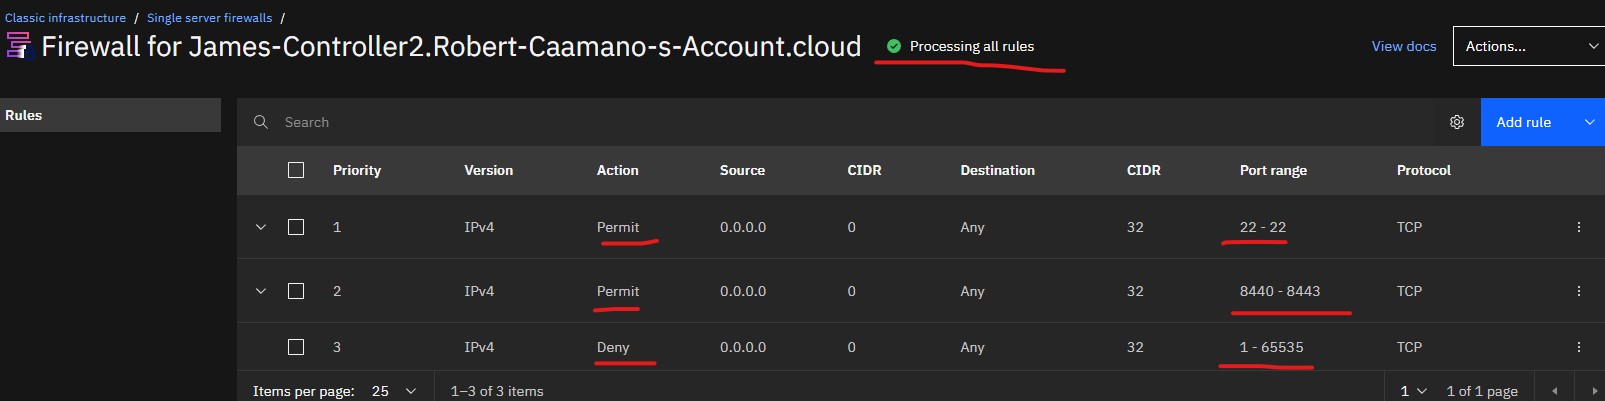
Add the following rules:
- ssh: port 22/TCP
- OpenZiti ports, e.g., 1280/tcp
- Deny rules to deny all other traffic
-
Make sure the firewall is active. It should display Processing all rules if it is active.
1.3 Log in and set up the controller
- Azure
- AWS
- Digital Ocean
- Oracle
- IBM
- Once the VM is created, we can get the IP address (and the DNS name) of the VM from the Virtual machine screen.
- Log in to the VM by using defined user "username" (default username is azureuser) and the private sshkey:
ssh -i <private_key> <username>@<ip>
or
ssh -i <private_key> <username>@<dns-name>
Use a fully qualified domain name (FQDN) to deploy the controller.
- Once the VM is created, we can get the IP address (and the DNS name) of the VM from the Instance detail screen.
- NOTE: DNS name is only available if you enabled DNS Hostnames under VPC.
- Log in to the VM with username "ubuntu":
ssh -i <private_key> ubuntu@<ip>
or
ssh -i <private_key> ubuntu@<dns-name>
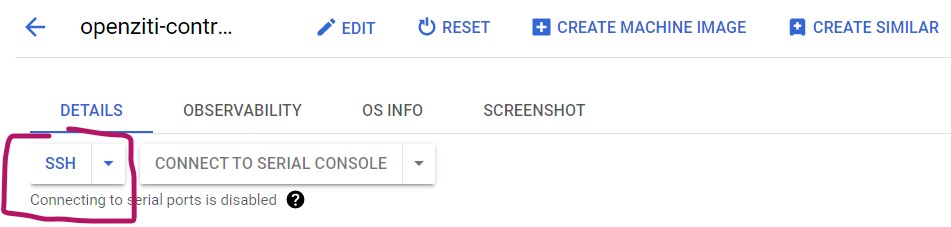
Once the VM is created, we can log in through SSH button on the VM instances screen.
- Once the VM is created, we can get the IP address of the droplet from the Resources screen.
- Log in to the VM with username "root" and IP address:
ssh root@<ip>
- Once the VM is created, we can get the IP address of the VM from the instance details screen.
- Log in to the VM with username "ubuntu" and the IP address:
ssh -i <private_key> ubuntu@<ip>
- Once the VM is created, we can get the IP address of the VM from the Devices screen.
- Log in to the VM with username "ubuntu" and the IP address:
ssh -i <private_key> ubuntu@<ip>